View source or report issues on GitHub
In the beginning was the command line
Professional computer people spend a lot of time staring at words (or at least letters and numbers), even the ones that make graphical things. They do this in two places: their text editors or IDEs (integrated development environment - more on those later) and the command line. A command line is a typing-based interface to your computer that lets you perform operations like move files and run software without needing to click things. They feel very alien at first, but once you get used to them they are awesome!
(P.S. If you’re really interested in computer history, the title of this section is also the title of a free short book you can find online with a lot of computer history in it. It’s very out of date now, but still fun!)
Let’s get into our command line.
The instructions below will both explain things and tell you to do things. If you see a checkbox, that means we want you to DO something. You can check them off as you go! If you do not see a checkbox, you are not being asked to do anything.
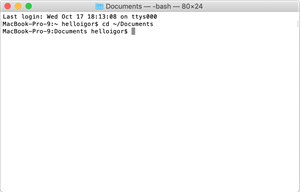
Mac Users
(image credit: MacPaw)
You need to open the Terminal app.
- Type
⌘ Command+Spaceto open your search menu - Type
terminal, then open the app. - Add this app to the dock by right-clicking it’s icon in the dock, choosing “Options” then “Keep in Dock”
Mac users can now jump to Basic Commands
Windows Users
Windows actually has TWO built-in command lines - one is called simply Command Prompt or cmd and the other is called Powershell. Powershell is much more powerful, and since you are learning this for the first time you should definitely use it!
-
Press the start button and just start typing
Replace Command Prompt With Windows Powershell when using Windows+X Menu. The option with that name should appear pretty quickly, and you can click it.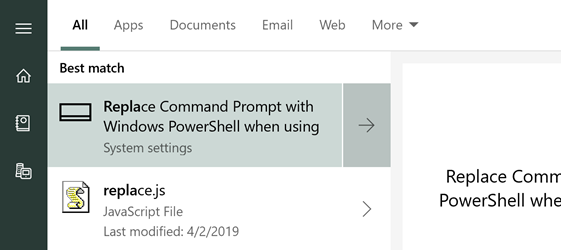
-
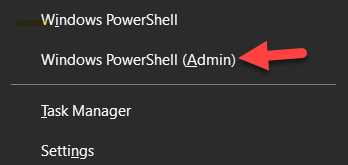
In the window that appears, scroll down until you see the option. Toggle it ON, if it’s not already, as seen below.

-
Now, you should be able to press
⊞ Windows+Xon your keyboard OR right-click on the start menu to get your power menu. When it comes up, choose the optionWindows Powershell
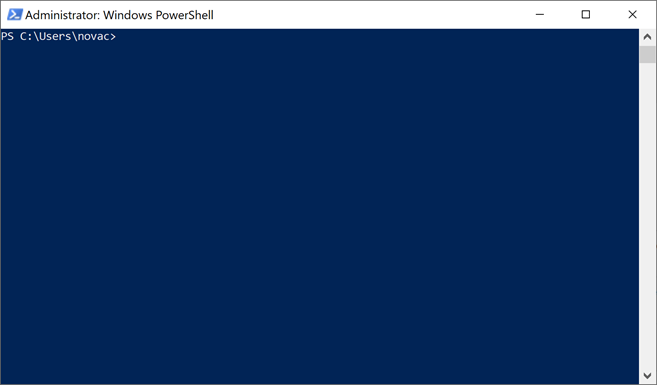
You should now have your command prompt open! You can pin this to the taskbar if you wish, for easy access later.
Some basic commands
Not every command line is the same. On Macs, the command line is powered by a program called bash. On Windows, it is Powershell. They are very different in a lot of ways, but luckily there are some commands that will work similarly on the two systems. Let’s practice some! Each of these commands should be followed by presing Enter or Return to run the command.
In each line, you will need to READ about the command first (without doing anything!) then follow the specific instructions below each line.
lswill list the files in the directory (folder) you are currently in.- Type
lsand press enter to see a list of files. (on Windows, typingdirwill do the same thing if you like that better)
- Type
pwdwill print the working directory - it tells you what folder you are in!- type
pwdand press enter, then see what happens. You should be in your main user folder. Most command lines give you the output ofpwdright on the command line without typing.
- type
cd ~changes directories to your home (~) folder- If you type this command now, it’s quite possible nothing will happen! You should already be in your home, or user, folder. Just in case you aren’t, type
cd ~and press enter.
- If you type this command now, it’s quite possible nothing will happen! You should already be in your home, or user, folder. Just in case you aren’t, type
mkdirnamewill make a directory, or folder.- We want to make a directory to hold our code for this course. For simplicity, let’s make it right here in your user folder. Type
mkdir ibcsto make a folder called “ibcs” in the current directory (we can always move this later if you want)
- We want to make a directory to hold our code for this course. For simplicity, let’s make it right here in your user folder. Type
cdnamechanges to a directory with the name you enter- Type
cd ibcsto move into your new folder. Hint: if you pressTabafter you typecd ibit should autocomplete the rest of the directory. Tabbing is the best!
- Type
touchname(Mac) orninamewill create a new (empty) text file.- Type
touch test_file(Mac) orni test_filethen typelsto see that you created the file!
- Type
cpoldfile newfilewill copy a file from one place to another.- Type
cp test_file test2, then typelsto see your new copied file.
- Type
mvoldfile newfilewill rename (or rename + move) a new file- To rename, type the original name then the new one. Type
mv test_file test1to change its name. Typelsto confirm it worked.
- To rename, type the original name then the new one. Type
mvoldfile newfolderwill move a folder to a new directory/folder, but keep the name.- Make a new directory with
mkdir lesson01, then typemv test* lesson01. The*tells the commandline to include everything that starts with test, so BOTH files should get moved. Confirm it usingcd lesson01followed byls.
- Make a new directory with
openfile_or_folder(Mac) oriifile_or_folder(Windows) opens the file or folder just like you double-clicked it.- Type
open .orii .to open the current folder in the Finder / Explorer (the.is a shortcut that means “current folder”) - This should have opened a file browser in the
lesson01folder. Do you see your test files? Go ahead and close it now, we don’t need that window. - Type
cd ..to move up to the previous folder (the..is the shortcut for “parent folder”). You should be back in theibcsfolder - usepwdto confirm that if you’re not sure.
- Type
Congratulations! You can now do some basic things in the command line. Welcome to hackerhood.
Study Materials
 You should probably make flash cards for these commands eventually, as they are very useful, especially
 ls, mv, cp, cd, pwd and touch (or ni)